Orders
 The Orders section in PickZ is designed to manage both inbound and outbound orders efficiently. This guide will help you understand how to use the Orders section, including creating, viewing, and managing orders. The Archive section provides a consolidated view of all archived orders, both inbound and outbound.
Inbound orders
The Inbound Orders section is used to manage orders coming into the warehouse. This includes tracking received goods and preparing them for storage.
How to Access:
- Click on the "orders" dropdown in the left navigation menu.
- Select "inbound."
Features:
- New Order Button: Create a new inbound order.
- Order Table: Displays a list of all inbound orders with details such as order number, lines, status, order type, contact, required delivery date (RDD), and created date.
- Search Functionality: Search through orders using keywords.
- Bulk Actions: Apply actions to multiple orders at once.
- Expandable Order Lines: Click the "+" icon next to each order to expand and view the order lines.
Creating a New Inbound Order:
- Click on the "new order" button.
- Fill in the order details:
- Order number: Automatically generated.
- Order type: Select "PO (purchase order)".
- Supplier: Select from the list of contacts.
- Required delivery date: Choose the expected delivery date.
- Order lines: Add products, their unit of measure (UOM), and quantity.
- Click "save" to create the order.
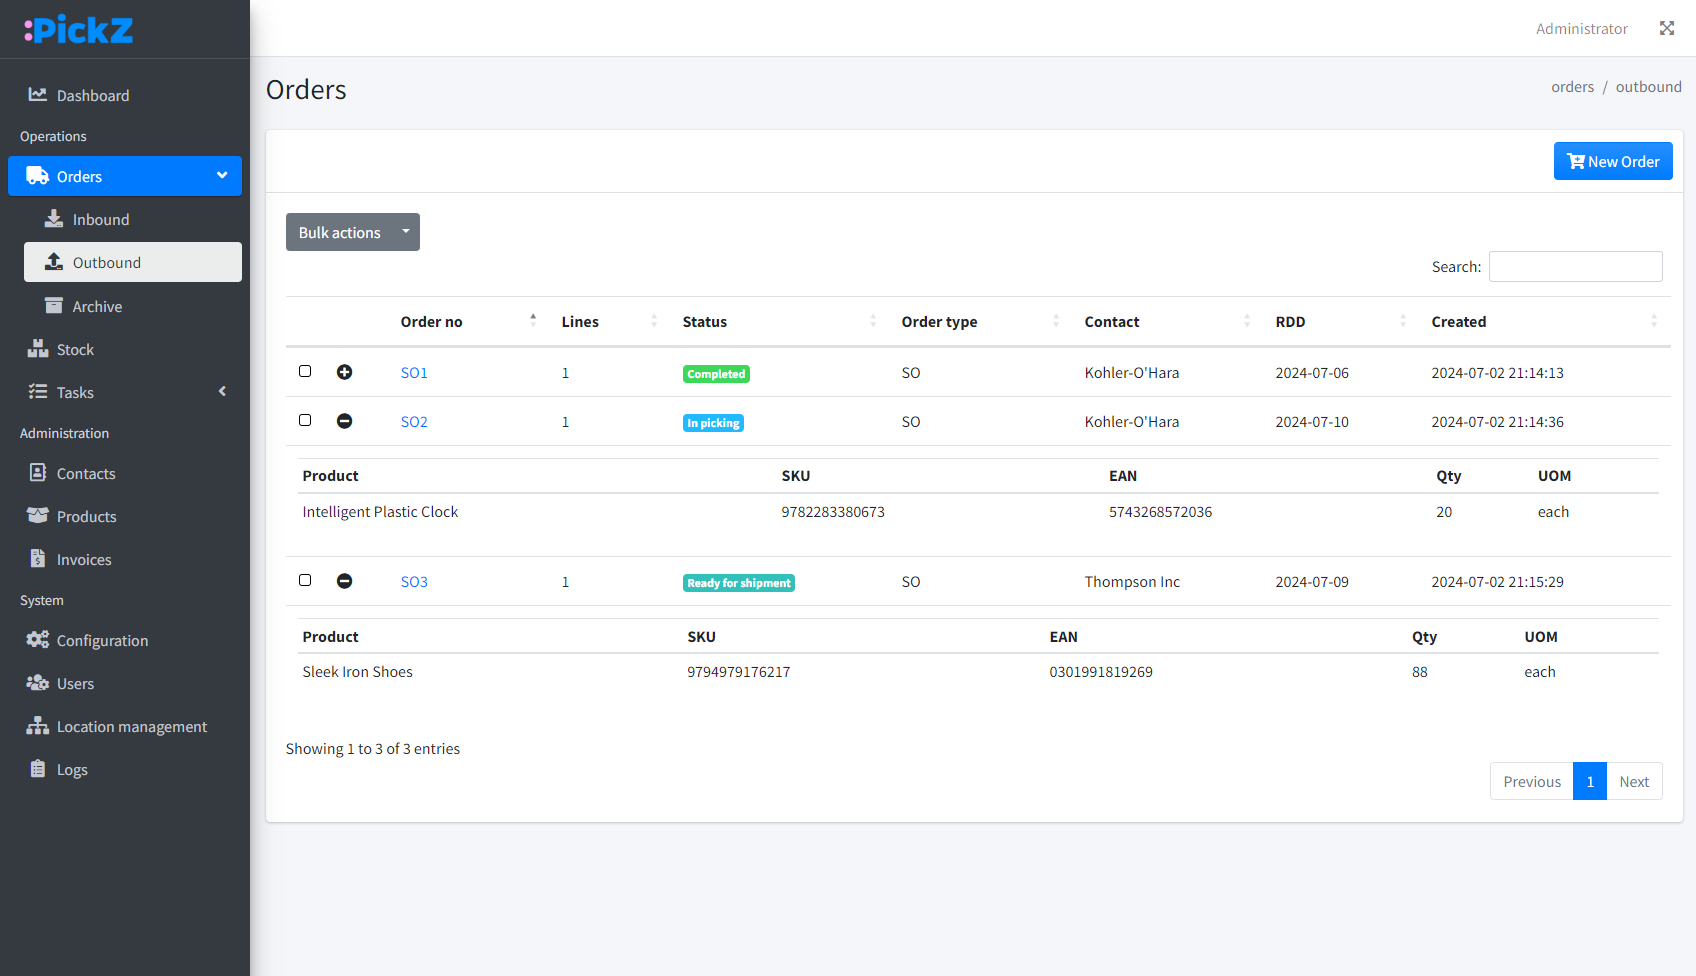
Outbound orders
The Outbound Orders section is used to manage orders going out of the warehouse. This includes picking and shipping products to customers.
How to Access:
- Click on the "orders" dropdown in the left navigation menu.
- Select "outbound."
Features:
- New Order Button: Create a new outbound order.
- Order Table: Displays a list of all outbound orders with details such as order number, lines, status, order type, destination, required delivery date (RDD), and created date.
- Search Functionality: Search through orders using keywords.
- Bulk Actions: Apply actions to multiple orders at once.
- Expandable Order Lines: Click the "+" icon next to each order to expand and view the order lines.
Creating a New Outbound Order:
- Click on the "new order" button.
- Fill in the order details:
- Order number: Automatically generated.
- Order type: Select "SO (sales order)," "BO (back order)," or "CRD_OUT (crossdock order)".
- Destination: Select from the list of contacts.
- Required delivery date: Choose the expected delivery date.
- Order lines: Add products, their unit of measure (UOM), and quantity.
- Click "save" to create the order.
Archive
The Archive section provides a consolidated view of all archived orders, both inbound and outbound.
How to Access:
- Click on the "orders" dropdown in the left navigation menu.
- Select "archive."
Features:
- Order Table: Displays a list of all archived orders with details such as order number, lines, status, order type, contact or destination, required delivery date (RDD), and created date.
- Search Functionality: Search through archived orders using keywords.
- Expandable Order Lines: Click the "+" icon next to each order to expand and view the order lines.
Bulk Actions
The Bulk Actions dropdown allows you to perform actions on multiple orders at once. To use bulk actions:
- Select the orders you want to apply actions to by checking the boxes next to them.
- Choose the desired action from the "bulk actions" dropdown.
Order details
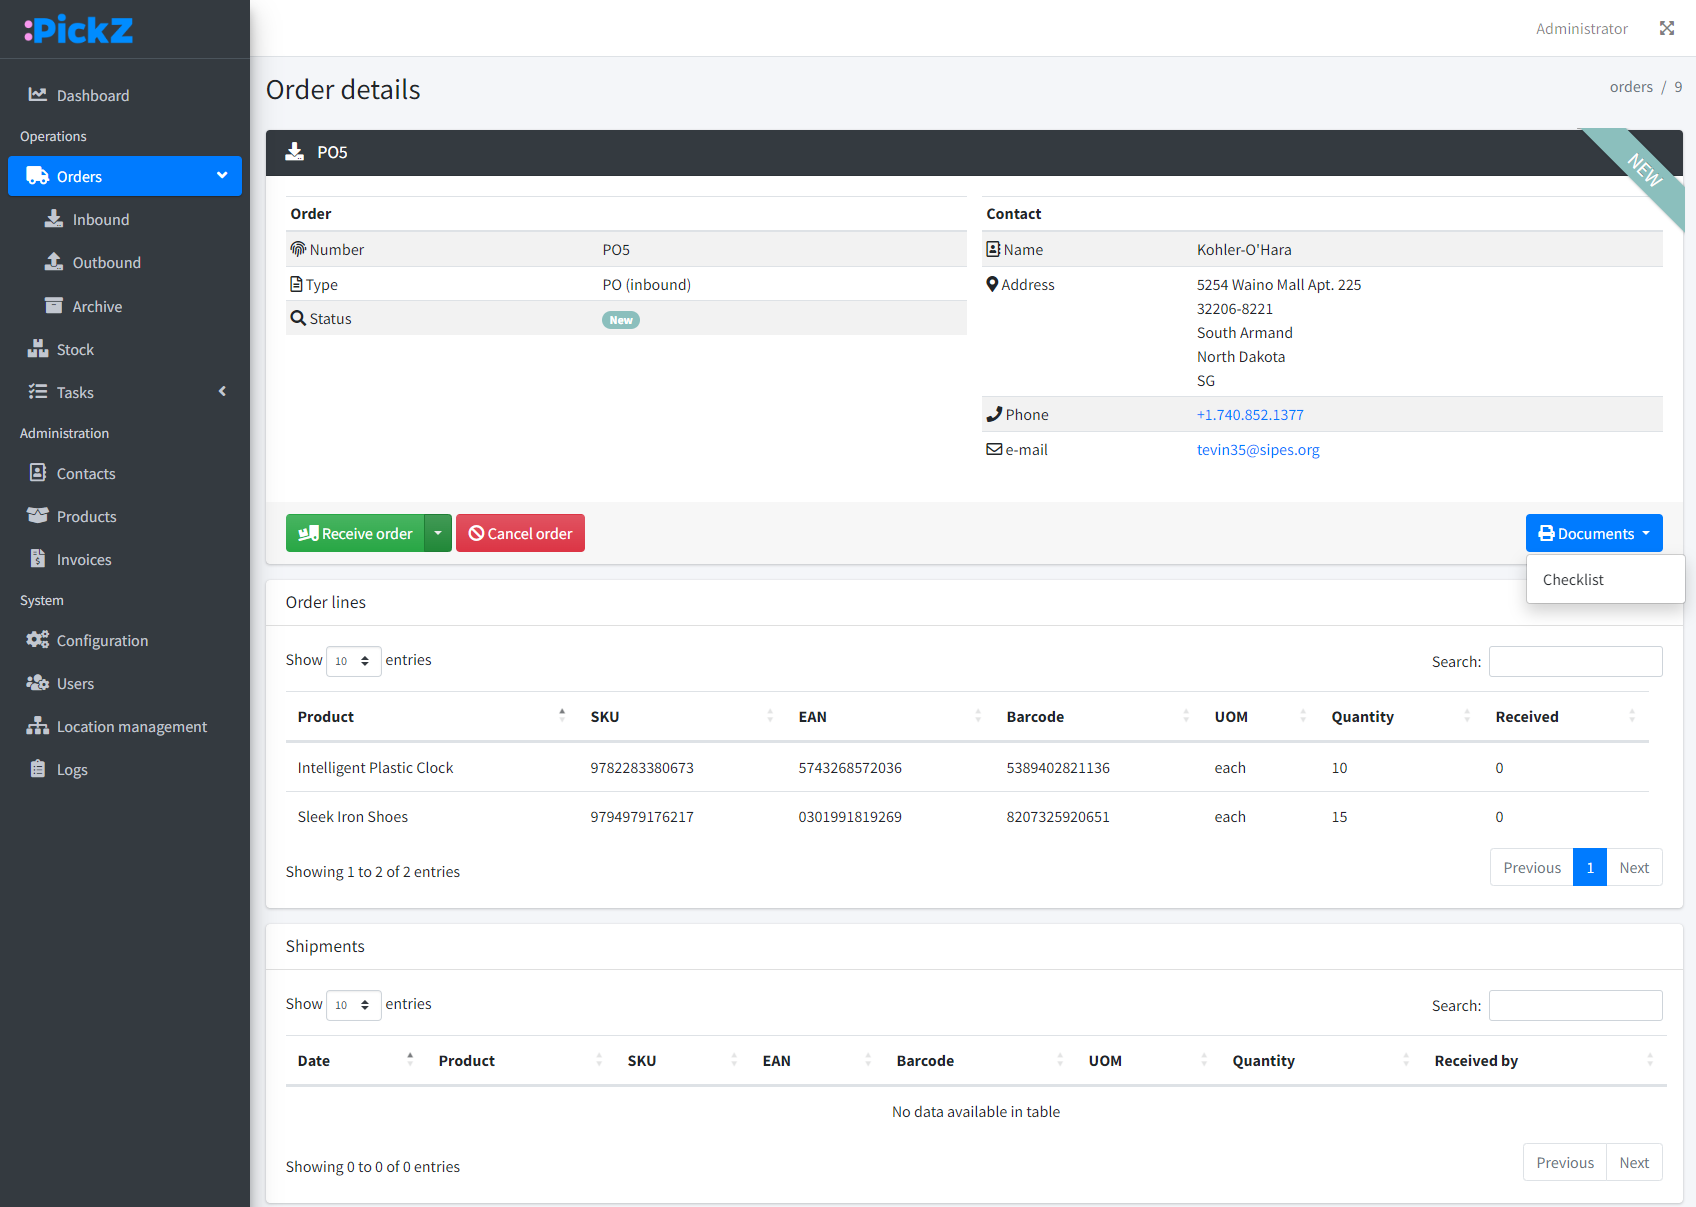
Click on an order number in the table to view detailed information about the order. This includes:
Order Summary
- Order number: Unique identifier for the order.
- Order type: Indicates whether the order is inbound or outbound.
- Status: Current status of the order.
- Contact Information: Details of the supplier or customer.
Order Lines
- List of products in the order, including SKU, EAN, barcode, UOM, quantity, and received quantity for inbound orders.
Shipments
- List of in- or outbound shipments associated with the order.
Actions
- Inbound
- Receive Order: Mark the order as received.
- Outbound
- Confirm Shipment: Mark the order as shipped.
- New Invoice: Create a new invoice for the order.
- Cancel Order: Cancel the order.
- Documents: Generate and download relevant documents such as checklists, pick lists, and delivery notes.